Copy or move rows to another sheet automatically
You may be interested in How to create CRM in Google Sheets.
In today’s data-driven world, managing information efficiently in spreadsheets is essential, whether you’re tracking sales leads, managing project tasks, or processing form submissions. One of the most common challenges is automating repetitive tasks, such as copying or moving rows from one sheet to another based on certain conditions.
Sheet Automatin is a perfect solution for this use cases. Let’s explore how it works, and why it’s the best choice compared to traditional scripting or other automation add-ons.
What Is Sheet Automation extension
Sheet Automation is a top-rated Google Sheets extension designed to help users automate workflows directly within their spreadsheet. No coding required.
If you haven’t installed Sheet Automation, it is an extension in Google Workspace Marketplace and click “Individual Install” to install the extension.
Once it is installed, go to sheet menu Extensions - Sheet Automation and open it. A sidebar should appear on the right side shortly.
The scenario
If you manage projects or multi-stage workflows in Google Sheets, you know the scenario: Data starts in Sheet A (e.g., “Task”) and needs to be moved to Sheet B (e.g., “Completed” or “Archive”) once a specific condition is met, like changing the status to “Done”.
Below is a sample sheet of Task.

There is a “Status” column where you fill out the status and change to “Done” at some point. You want the task to be automatically moved to Archived sheet when the Status column is changed to the “Done”.
While Google Apps Script can do this, it requires coding expertise and constant maintenance. The easiest and most reliable solution is the Sheet Automation extension, which handles moving rows between separate sheets with just a few clicks.
Just move the row
To move a row automatically you need to create automation insde the Sheet Automation sidebar.
Check out this video tutorial to see how easy it is to create the automation:
This automation will monitor the sheet and move rows when needed. It works like a bot behind the scene.
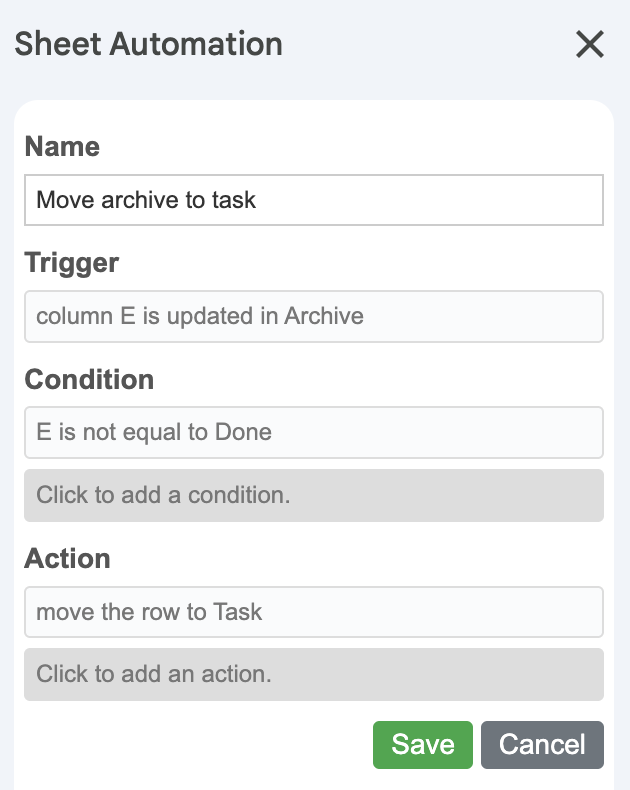
Below is a screenshot of the finished rule.
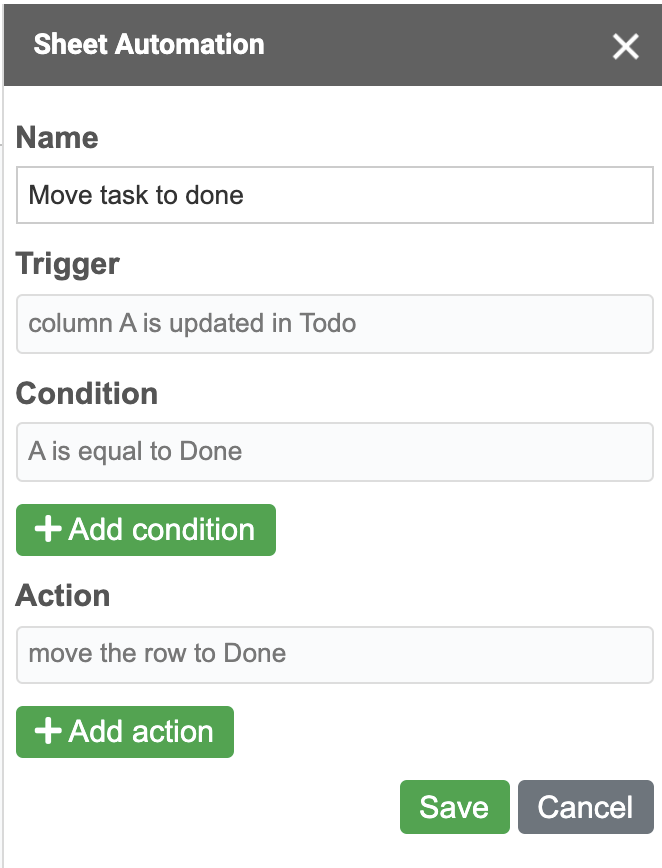
A typical automation consists of three parts: trigger, condition and action. We will explain each part in details.
Trigger
Trigger is the start point of the whole automation. It will listen for events in your sheet, such as when sheet is updated or a form is received, then kick off the workflow.
In this case, we only care about the status column. So Column Updated trigger is used to monitor the column.
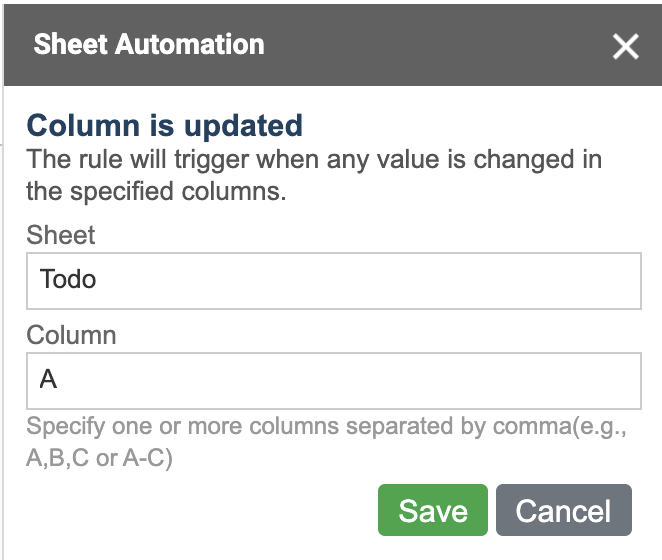
It specifies Task sheet and E column, which means the automation runs every time someone edits a cell in column E of the Task sheet.
Multiple columns can be configured using comma or hyphen to seperate them.
Condition
Condition works as a filter so that automation will be fired only when the condition is satisfied.
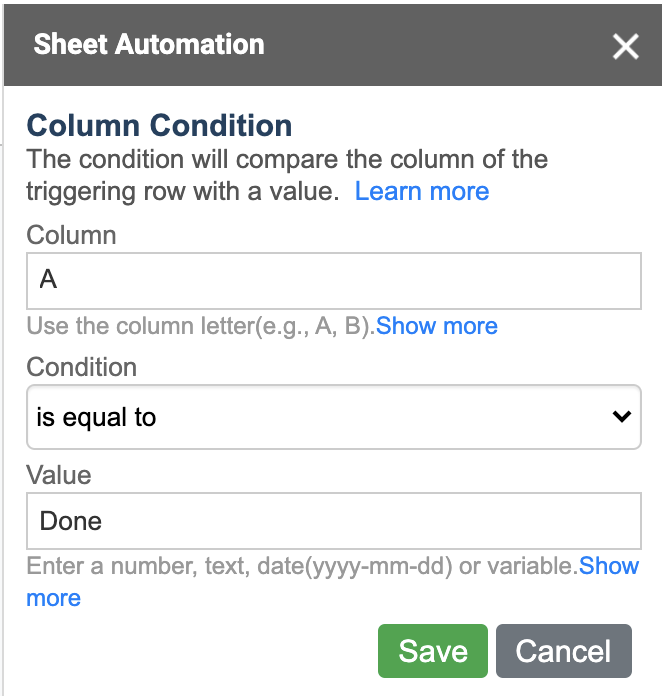
This condition will check if the Status value is “Done”.
More than one condition can be configured when you want to make sure multiple criterias are matched.
Action
Action defines what the automation does.
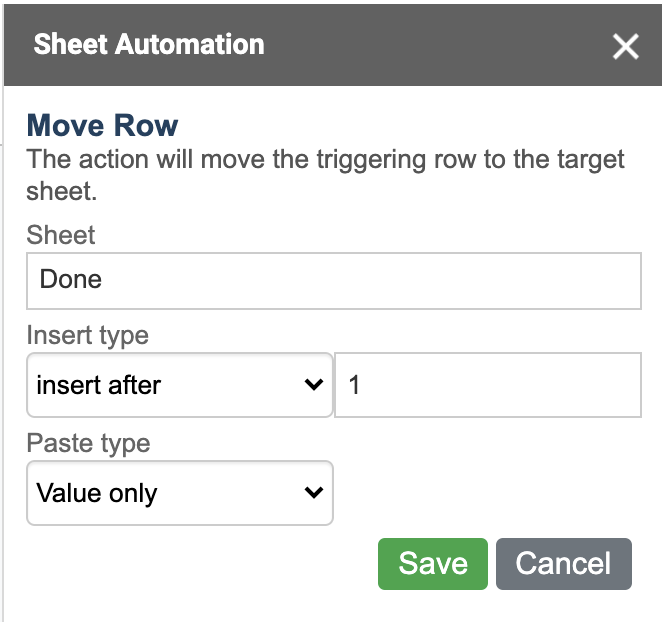
The destination sheet of the action is Archived. By default the action will append the row to the bottom of the destination sheet.
When moving rows between two sheets, it is crucial that the column headers and column order are identical in both the Source Sheet and the Destination Sheet. If they are different, the data for each cell might end up in the wrong column of the destination document.
You can choose “Copy Row” action if you want the original data to remain in Task sheet as well, but Move is better for task tracking to keep your active list clean.
Test and troubleshooting
Once the rule is saved, it is ready to do the job.
Go to your Task sheet and change the status of one task to “Completed”. Within seconds, that entire row should disappear from “Active Tasks” and appear at the bottom of your Archived sheet.
If the rule does not work as expected, something may be wrong in the automation. Please check if the configuration is correct in trigger/condition/action.
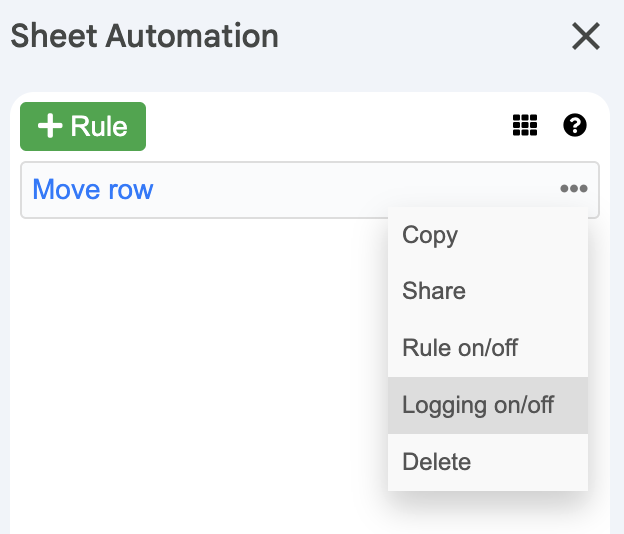
You can also enable logging to help troubleshooting. Once logging is turned on, the automation will write detailed traces to a sheet named “sheet-automation-logging”.
Move row backward
A further requirement is to move the row back to Task if the task is not completed in Archive.
This could be achieved by intorducing another rule.
The rule is very similar to the first one. It monitors the status column of Archived sheet and move the row back to Task sheet if the value is updated to something that is not done.
Move row to the top
With Sheet Automation, you can not only copy or move rows between sheets, you can also control where the rows go, including moving them to the top of a target sheet automatically.
Suppose you want to move a row to the top when a “Status” column changes to “Urgent” so that people can easily see it.
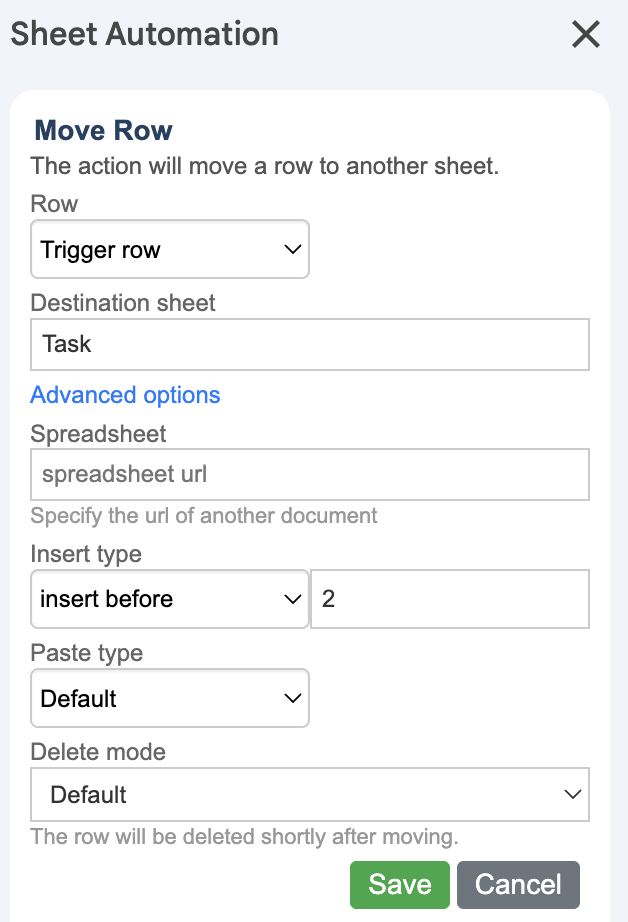
With insert row option configured in the action, the row will be moved to the second row of the destination sheet.
You can also insert the row in any position of the sheet.
Move row to another document
It is also possible to move row to an entirely different workbook if you want to keep the archived data separately.
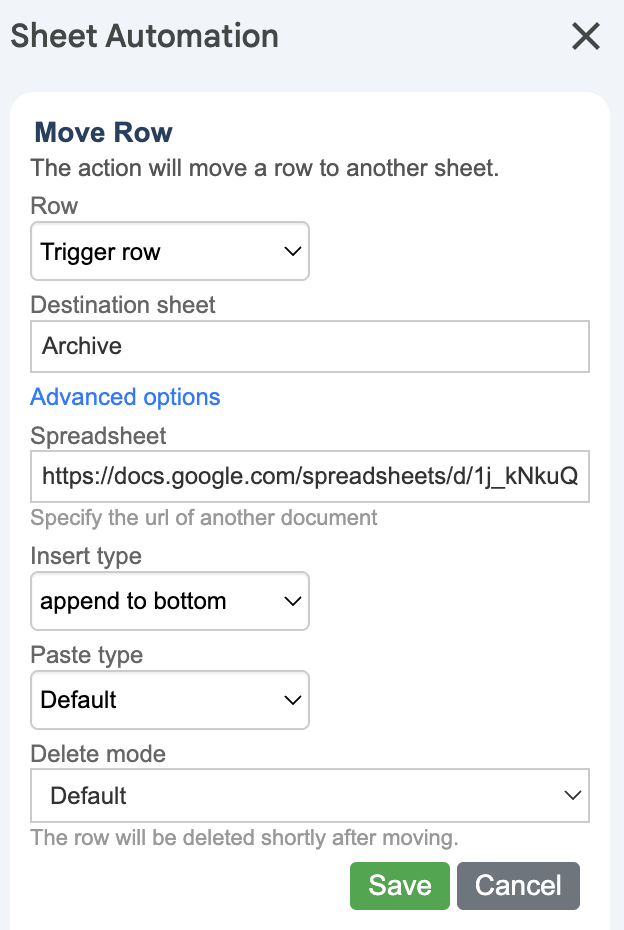
The only thing you need to do is specifying the “spreadsheet” option with the link of target document. Make sure you have proper access permission to the spreadsheet.
More use cases
There are many more use cases that you can leverage the Moving Row feature for:
- move a form response to another sheet
- delegate a sales inquiry to a specific representive
- copy a changed row to a backup sheet for logging purpose
- achieve a row when the data is not relevant
Final thoughts
The ability to copy or move rows automatically may seem like a small feature, but it can transform the way teams manage data. Instead of manually moving information or writing complex scripts, you can rely on the Sheet Automation extension to handle everything smoothly and intelligently.
If you’re tired of juggling formulas, scripts, and half-working add-ons, it’s time to switch to a tool built for modern spreadsheet automation.
There are currently no comments on this article, be the first to add one below